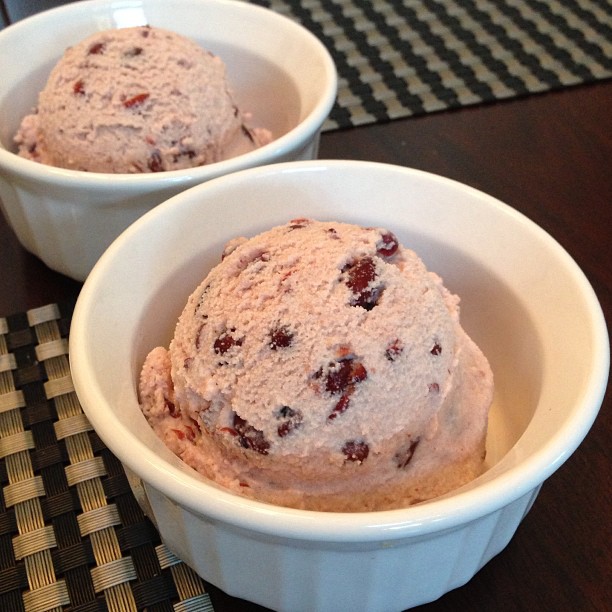
Red Bean Ice Cream

- Preparing Time: -
- Total Time: -
- Served Person: Makes a scant 2 quarts
- 1/8 teaspoon salt
- 2 tablespoons cornstarch
- 2/3 cup sugar
- 3 cups whole milk
- 1 cup heavy (whipping) cream
- 3 egg yolks
Preparation 1. Set aside 1/4 cup of the milk in a small bowl. Combine the rest of the milk with the heavy cream and 1/3 cup of the sugar in a heavy, medium-large pot over medium heat. Let the milk mixture get very hot but not quite scalded. 2. Meanwhile, combine the remaining 1/3 cup sugar, the salt, and the egg yolks in a heat-proof bowl, and whisk until the yolks thicken slightly and get lighter in color. 3. Add the cornstarch to the milk you set aside in the small bowl, smushing it in with your fingertips to make an absolutely smooth paste. 4. When the milk and cream mixture is almost boiling, whisk in the cornstarch slurry, which should thicken the milk almost immediately. Turn the heat down to medium-low. 5. With a ladle in one hand and a whisk in the other, and a wooden spoon next to the stove, ladle some of the hot milk mixture into the yolk mixture, whisking for all you're worth as you do so. After two ladlefuls have been whisked into the yolk mixture, pour the now-tempered yolk mixture into the pot of hot milk, and whisk the whole thing hard. 6. Now stand there and stir constantly, watching carefully, until the eggs further thicken the milk, though only slightly, 3 to 4 minutes. Because we're doing this over direct heat rather than in a more time-consuming double-boiler, stir mindfully, alternating between the whisk to incorporate everything and the wooden spoon to get into the corners, where the eggs would otherwise tend to cook first. 7. The minute the custard has thickened, transfer it from the pot to a clean heat-proof bowl and whisk in the anko and the vanilla, if using. Let cool to room temperature (if you want to speed this up, set the bowl in a sink partially filled with ice water), then cover it and refrigerate it overnight. 8. The next day, transfer the custard into your ice cream maker and let 'er rip according to the manufacturer's instructions. When the ice cream is done, remove the dasher, fight over who gets to lick it, be nice and share, and transfer the finished ice cream to a storage container. Place the container in the freezer and store until you're just about ready to serve (like all ice creams, this is most full-flavored when softened slightly). From Bean by Bean: A Cookbook. by Crescent Dragonwagon. Copyright © 2011 by Crescent Dragonwagon. Published by Workman Publishing.
Preparation 1. Set aside 1/4 cup of the milk in a small bowl. Combine the rest of the milk with the heavy cream and 1/3 cup of the sugar in a heavy, medium-large pot over medium heat. Let the milk mixture get very hot but not quite scalded. 2. Meanwhile, combine the remaining 1/3 cup sugar, the salt, and the egg yolks in a heat-proof bowl, and whisk until the yolks thicken slightly and get lighter in color. 3. Add the cornstarch to the milk you set aside in the small bowl, smushing it in with your fingertips to make an absolutely smooth paste. 4. When the milk and cream mixture is almost boiling, whisk in the cornstarch slurry, which should thicken the milk almost immediately. Turn the heat down to medium-low. 5. With a ladle in one hand and a whisk in the other, and a wooden spoon next to the stove, ladle some of the hot milk mixture into the yolk mixture, whisking for all you're worth as you do so. After two ladlefuls have been whisked into the yolk mixture, pour the now-tempered yolk mixture into the pot of hot milk, and whisk the whole thing hard. 6. Now stand there and stir constantly, watching carefully, until the eggs further thicken the milk, though only slightly, 3 to 4 minutes. Because we're doing this over direct heat rather than in a more time-consuming double-boiler, stir mindfully, alternating between the whisk to incorporate everything and the wooden spoon to get into the corners, where the eggs would otherwise tend to cook first. 7. The minute the custard has thickened, transfer it from the pot to a clean heat-proof bowl and whisk in the anko and the vanilla, if using. Let cool to room temperature (if you want to speed this up, set the bowl in a sink partially filled with ice water), then cover it and refrigerate it overnight. 8. The next day, transfer the custard into your ice cream maker and let 'er rip according to the manufacturer's instructions. When the ice cream is done, remove the dasher, fight over who gets to lick it, be nice and share, and transfer the finished ice cream to a storage container. Place the container in the freezer and store until you're just about ready to serve (like all ice creams, this is most full-flavored when softened slightly). From Bean by Bean: A Cookbook. by Crescent Dragonwagon. Copyright © 2011 by Crescent Dragonwagon. Published by Workman Publishing.


